In an answer to Cee’s Black & White Post Processing Photo Challenge, I put this post together.
{UPDATE NOTICE: I have put the screen shots of the street lamp conversion in as 20161016. Was working on the e-book and did them. Well worth looking at. PEV}
Here is the above photo in color.


In the Lightroom screen shot you can see the color sliders pushed around to bring out the textures in the clouds and darken the building.
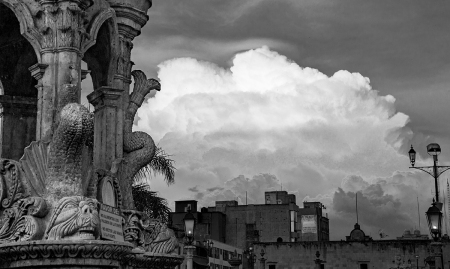
However to make the fountain in the foreground apparent to the viewer, I used the adjustment brush.

I did not like the warning sign to take the viewer’s eye into it so I left it out of the adjustments. That way the viewer looks at the “water beasts” of the fountain & the clouds. Again you can see my pushing the sliders around in the screen shot. I also use the Dehaze slider on the overall shot to increase the clouds depth of texture.
Here I am further back from the church where the fountain is at, but again I want the focus on the towering clouds.

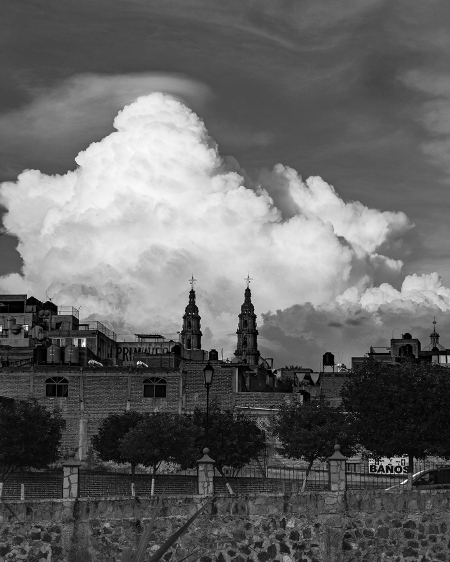
The color original shot, again I have “Dehaze” the shot some to increase the cloud structure. The color “Graduated filter” slider screen shot. After adjusting the shot in the color mode. I then hit “ctrl + ‘” to make a Virtual Copy. That copy then gets the Black & white treatment.


As you can see the sliders are massively changed in the black & white to lighten the river containment wall and add some balance.
I then decided to crop it more to the clouds on top and removed some of the rock river containment wall.
I had to use the green color slider to lighten up the trees, just to powerful a black and that was also part of the cropping consideration.

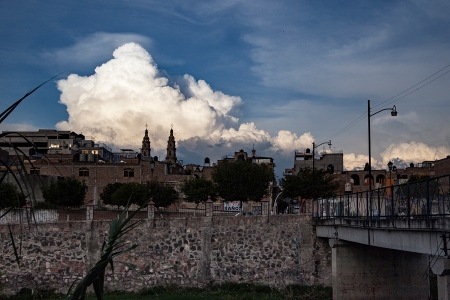
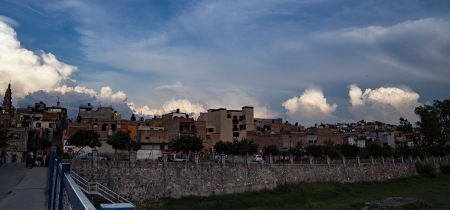
These clouds coming in over the western side of town were intense, I wanted to place as much as possible on them yet leave the human element of the town in focus.
The color image.
Pushing the Color sliders to darken the Blue & Aqua on the sky & clouds, while using the green, red, orange, to lighten the city building, road and palm fronds made that happen. {sorry guess I forget the Lightroom screen shots}

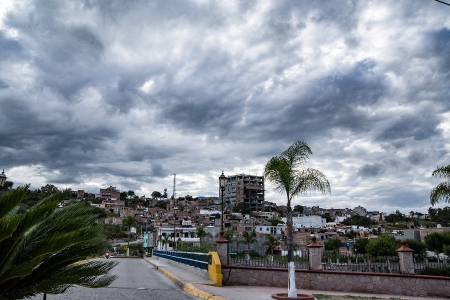
Again, I want the emphasis on the clouds, while letting the river water draw the viewer “upstream into the photo”.

As you can see I first correct the color image to get where I want to go.

Then pull the Virtual Copy sliders around to make things more in that range of ideal image. Pushing the blue & Aqua sliders to darken the skies. Sliding the red & orange & yellow & green to lighten the city and river banks. I could also if I wanted more of the reflection on the river use the Adjustment Brush to add some Dehaze & Clarity plus other adjustments and make it stand out more.

In this shot, I wanted the clouds there to make a nice background, but wanted to keep the viewer on the church itself. So this shot went through several adjustment. Also in Lightroom “crtl + E” opens the image in Photoshop and lets you save those changes BACK INTO Lightroom, quick and fast.

Here is the cleaned up color version. Below is the Lightroom screen shot showing the several versions I had Virtual Copies & Photoshop changed which puts a TIFF file into Lightroom.


The TIFF with all color sliders zeroed.

The Black & white version and the color sliders pushed around to draw the eye to the church. By playing with the”red & orange & purple” sliders I got the brick work of the church to standout more. Since there is the palm fronds and plant at the bottom I did push up the green slider to lighten them, keeping interesting detail.

And the top screen shot to show the Contrast slider and Exposure sliders pushed up. Highlights are pulled down to keep the clouds from blowing out.
You can also see in the final image I have cropped sky down lower, the plants at the bottom are cropped up towards the church. I also in the final image used the Burn in Photoshop to darken the Shadow & Midtones of the plants some more to keep the eye on the church.
Street Lamp Sunset
{UPDATE NOTICE: I have put the screen shots of the street lamp conversion in as 20161016. Was working on the e-book and did them. well worth looking at. PEV}
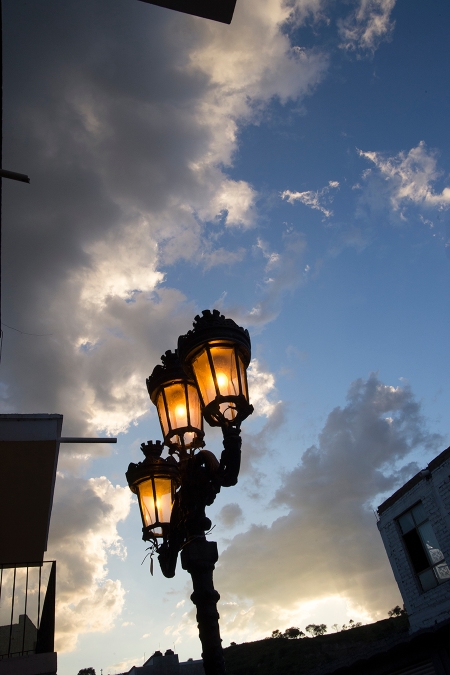
I have fun with these street lamps… this one was lit up and the clouds behind made a nice composition… but way too many distractions…
So to work on it and we have.

Virtual Copy at this point and the Black & White work begins to get this image.
 In the above screen shot, you can see the virtual copies. Because these are just sets of instructions NOT whole image files, you an make several without the huge disk memory space use of creating several Photoshop files. The pipe pointing at the street lamps had to go, “crtl + E” and into Photoshop, once you make your changes hit save in Photoshop and the TIFF file is created in Lightroom with those changes. Very quick and easy to move back & forth in the work flow. Again nothing in the original RAW file is affected/effected.
The photograph was shot with the understanding I wanted the ‘angle of the street lamps’ to be matching the ‘angle of the clouds’ so I knew I would crop and straighten it out later. Get rid of the pipe by itself up above the balcony. Not much about the balcony & roof on the left side. Simply too much Healing brush for my desires. I knew I wanted the sunset and street lamps to be focus, so I figured I would wait and see where I cropped at. As you can see in the right hand photo, just a tiny piece left after I cropped and straightened the image. I did apply some “Dehaze” on the Main slider and increased the exposure to compensate. Both “Dehaze” and “Clarity” darken the image. 9 years as Photo Editor of 6 newspapers, working an image to make something of it is nothing new to me.

In these two screen shots you can see that I have cropped the image. I have removed the offending pipes. but just a little of the roof on the right side remains. The exposure sliders have been adjusted some, but not the color sliders.

The Black & White conversion and the beginnings of the color sliders being moved around.

In the above screen shot you can see that the color sliders have been adjusted to lower the street lamps, the ‘orange’ & ‘yellow’ dim these lights nicely and don’t affect too much else.
In the screen shot below, I have also adjusted the exposure, contrast and other sliders for the black & white effects.

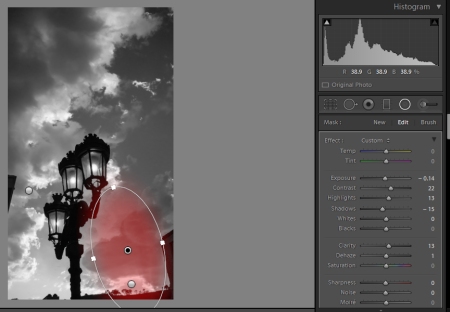
Here I have started to use the “adjustment brush to darken in the clouds and make my “light beams” more obvious without overpowering the whole photo. Those rays on the setting sun were a bit hard to keep. I used an ‘adjustment brush’ on that area & then used a 2nd adjustment brush layering on the darker area on the top to lighten it back up.

The below screen shot you can see I put a second ‘adjustment brush’ to lighten up the area where the first adjustment brush was too dark.

Next I have used the ‘circle graduated filter’ to darken the HOT spot of the sunset.

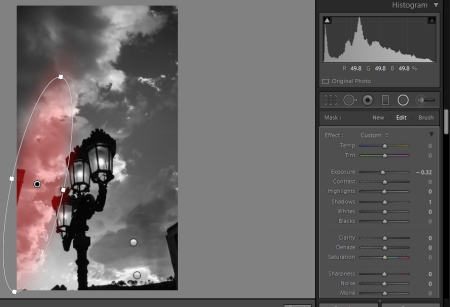
Next screen shot, I have come in with a second ‘circle graduated filter’ and adjusted the contrast of the “light beams” & clouds. Because each of these you can go back and re-adjust, you may play for hours to do this. Since I was shooting for the sunset & those beams in the very bottom right. Yes, the lights of the street lamps were near correct exposure too. Pure Luck, photography is a matter of timing, being there when the light is right. However as you can see, several objects are really screwing up the photograph otherwise. I knew I wanted the diagonal of the lights to match the clouds so shooting off angle on the frame did not matter. I would straighten it later. A single second to click the shutter and capture the image, hours in a darkroom or in Lightroom doing post-process, photographer verses a snap-shot shooter.
In the bottom screen shot, you can see I have added a third ‘circle graduated filter to reduce the the exposure slightly on the left side of the image clouds.
In the bottom screen shot, you can see the global “Dehaze” control at the bottom of the tools panel.
Again I must stress, everything can be adjusted & re-adjusted, you may find adjustments on one level messing up some thing and need to go back and forth adjusting stuff.
Your end product, that Final Photograph, however will be so much better for the effort.
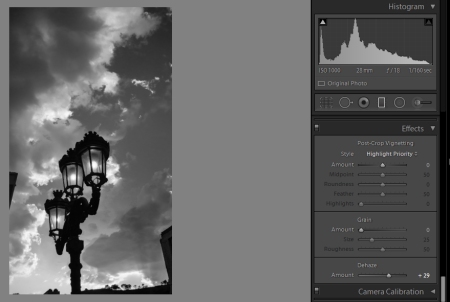
The final image again….

Well, I do answer questions, so ask me in the comments below if there are issues about what I did here.
And I hope Cee likes my showing the difference between “auto black & white” conversion and a Old Timer playing around with the tools of the trade.
I do put my camera in black/white mode when shooting for black & white, I started shooting film in 1962 at age 4yr. I had my 1st darkroom at 16 in 1974, so I don’t have an issue with looking at a color image and conversing it to black&white, but by having ALL images in RAW, and the reminder of seeing it on my camera in b/w while shooting is nice. I get a clue what is happening and what to adjust if needed while shooting.
Creative shooting everyone
Save
Save
Save